What is the Feynman Technique?
Where It Comes From and Why It Works
The Feynman Technique is a straightforward way to study. You pick a topic, break it down into clear explanations, find where your understanding is weak, and improve it. It’s named after a scientist known for his love of clear ideas. This method helps students, workers, and curious thinkers because it builds actual knowledge. Instead of trying to memorize fancy terms, you turn concepts into simple language. This helps you see what you understand and what still confuses you.
Four Steps to Use It
- Pick a topic to learn.
- Explain it in everyday language.
- Spot the parts you don’t get and review them.
- Make it even clearer with examples or comparisons.
Seems too simple? That’s the idea. The toughest challenge is admitting where your understanding falls short.
Step 1 — Pick and Clarify the Concept
Focus on the right level
Stick to something focused. Instead of saying, “I’ll learn calculus,” say, “I’ll understand the chain rule and explain how it works.” A smaller focus makes this method effective. You conquer small parts that add up to a bigger understanding.
Steering clear of concepts that are vague or specific
If your topic is too general, you’ll struggle with where to start. If it’s way too specific, it’ll be hard to connect different ideas. Pick a focus you can explain in 10 to 15 minutes. That’s a good balance—it’s detailed enough to matter but quick enough to try out.
Step 2 — Teach a Kid (or Even Yourself)
Keep it simple
Act like you’re explaining this to a curious teenager. Break it down with short sentences. Don’t use tricky words. If you need to use a technical term, take the time to explain it. Teaching this way makes you simplify your thoughts. It also helps you notice where things don’t make sense.
Use comparisons and examples.
Analogies work like mental bridges. Trying to explain electrical current? Picture water moving through pipes. Struggling to describe enzymes? Think of a lock fitting into a key. Metaphors aren’t shortcuts. They help your brain form links and make sense of ideas.
Step 3 — Spot Gaps and Reflect
Ways to find weak areas
You might stumble as you explain something. Maybe you realize your definition loops back on itself, or you get stuck explaining a proof step. These pauses are a huge clue. Take note of them. They show you what needs more study.
Techniques to review with focus
Don’t try to power through an entire chapter at once. Focus on specific parts. Fix the proof, redraw the diagram, or tackle a problem that’s connected. Switch between three steps: read from a simple source, solve a quick problem, and then explain that small part in your own words. Keep going until it feels natural.
Step 4 — Simplify and Get Things in Order
Make a summary
Shrink everything down. Write a one-page summary that explains the main point, includes one basic diagram, and highlights 3 to 5 examples. If you can explain the idea and support it with a few examples, you’ve turned knowledge into something practical.
Use tools like mind maps, cheat sheets, or flashcards
Use mind maps to see how ideas connect. Write summary sheets to list formulas and steps. Turn tough parts into flashcards. Skip cards that just quiz definitions. Make flashcards that ask questions like “Why does X work?” or “How can you prove Y?”
Mixing the Feynman Method with Study Techniques
Using spaced repetition and active recall
Spaced repetition works well with the Feynman Technique. After you break down and simplify an idea, go over it again in 1 day, 3 days, or a week. Each review should make you start fresh and explain it again. This use of active recall helps you lock in what you’ve learned.
Switching up practice with interleaving
Switch between topics as you study. Don’t spend 90 minutes focused on one subject. Rotate between connected ideas to build stronger mental pathways. Mixing subjects can help you understand when to apply each method instead of just knowing how they work.
Hands-On Practice and Useful Checklists
Daily Feynman Exercise
- Choose a single topic (10 minutes).
- Explain it out loud or write it down (10 minutes).
- Find two areas where you are unsure and address them (15 minutes).
- Break it down into a short paragraph (5 minutes).
Small efforts every day add up over time.
Checklists to use weekly or monthly
Weekly, recall and explain five concepts from memory. Every month, test your understanding by solving a practical problem or teaching someone else. Pay attention to repeated mistakes. These gaps should guide what you focus on in the next round of learning.
Common Mistakes and How to Avoid Them
Thinking you’ve mastered something just because it feels familiar
reading and feeling like something makes sense, doesn’t mean you’ve mastered it. You might think you get it, but can you break it down and explain it? Try the Feynman Technique—it helps you spot weak spots by making you explain the idea, not just recognize it.
Oversimplifying detailed or deep ideas
Keeping things clear is the aim, not twisting the meaning. When we simplify, we shouldn’t leave out important parts. If a comparison hides a key flaw, point it out. A good lesson includes exceptions. For instance, you’d say, “This method applies, but not always.”
How to Use Feynman’s Approach in Subjects
Math and Problem-Solving
Go through the proof and explain why each part matters. Show why formulas make sense instead of just plugging in numbers. Use examples to teach. Demonstrate a calculus rule on two different functions to make the pattern obvious.
History and Literature
Share the story behind it. What caused these events to happen? When it comes to literature, describe the main ideas in simple words. Link those ideas to specific scenes or quotes from the text. Using a storytelling approach works well with this method.
Science and engineering
Discuss experiments and what they show. In engineering, look at systems by breaking them into chains of causes and effects. Visuals can help explain ideas, and drawing can be a teaching tool.
Languages and soft skills
Use examples to teach grammar basics, or show how negotiation works through role-playing. For language learning, try translating a concept into the language you’re learning, then back to your own language. This back-and-forth process helps spot what you’ve missed.
Study Habits and Mindset
Curiosity and questions
Ask “why” often. Turn facts into puzzles. Ask things like, “Why does this happen?” or “What would fail if X changed?” Staying curious makes the method exciting. It changes plain facts into challenges you want to figure out.
Handling frustration
You will face obstacles. That is a sign you are learning. Split the big problem into smaller steps so they feel manageable. Celebrate little victories as you make progress. If you get stuck, change focus for a bit. The mind often works out tricky stuff while you think about something else.
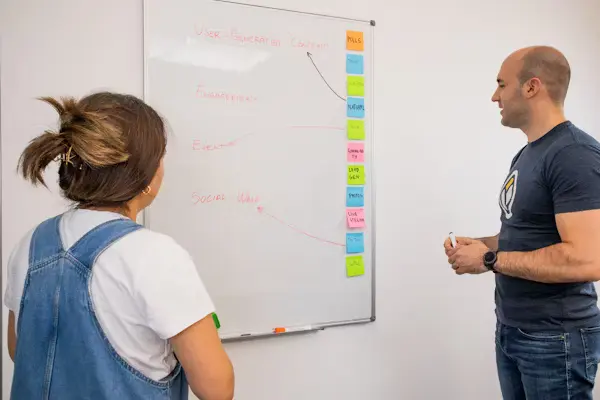
Using Feynman in Groups or Teaching
Teaching with peers
Team up and teach one another for 10 to 15 minutes. Pay attention to how clear it is. If your partner says, “This part doesn’t make sense,” treat that as a problem to solve. Teaching in groups helps uncover weak points faster.
Feedback loops and shared teaching
After your turn, ask two key questions: “What made sense?” and “What didn’t?” Use their input to improve how you explain. Then switch roles. Teaching others helps you organize what you know,w so it’s easy to understand.
Tracking Improvement and Understanding
Checklists to assess yourself
Make a basic list to keep track:
- Can I put this into simple words?
- Can I share two examples?
- Can I tackle a fresh problem with this idea?
- Can I find what doesn’t work for it or where it might fail?
If you can check all these boxes, you’re almost there.
When should you move forward?
Move forward once you can explain the idea, handle questions about it, and use it in different situations. If doubts pop up again after reviewing it later, go back and practice. Mastery takes repeated effort.
A 30-Day Plan to Learn Anything
Step-by-step Schedule
Week 1 — Build a Base
- Start by picking your topic and writing a simple one-paragraph summary about it on Day 1.
- Spend Days 2 and 3 teaching the idea out loud to yourself and jotting down anything you’re unsure about.
- From Day 4 to Day 7, study to fill those gaps and explain the topic to yourself.
Week 2 — Dive Deeper
- Come up with five different ways to explain or apply the topic.
- Make flashcards from your explanations to memorize key points.
- Begin using spaced repetition to help it stick in your memory.
Week 3 — Apply It
- Tackle three problems or design three examples that involve the topic
- Teach what you’ve learned to a pal or record yourself explaining it.
Week 4 — Wrap It Up
- Focus on pulling everything together and reviewing what you’ve done.
- Test yourself under pressure. Explain everything in just 10 minutes without looking at any notes.
- Create a one-page cheat sheet to summarize key ideas.
- Pick the next related topic to study and find ways to link it to what you’ve already learned.
This approach shifts you from just knowing something to mastering it within a month if you stay steady and focused.
Conclusion
The Feynman Technique works like a guide to learning. It helps turn fuzzy understanding into clear, shareable pieces. When you pick a good topic, size it in simple terms, spot what you don’t grasp, and break things down further, you make learning easier to repeat. Combine this method with spaced practice, quick daily habits, and honest input from others to pick up new things faster without wasting energy. Try it with something you’re interested in—teach it to someone, mess up a little, fix your mistakes, and see how fast it sinks in.
FAQs
What if I can’t find someone to teach?
Pretend you’re teaching someone who doesn’t know anything about your topic. You can explain out loud, write them a letter, or even make a quick video. What’s important is breaking it down as as you can. When you go back to read or listen, you’ll notice any parts that don’t make sense, just like a real student might point them out.
How much time should you spend on a Feynman session?
Keep it short and to the point. Try sticking to around 30 to 45 minutes. Spend about 10 to 15 minutes explaining, use 15 to 20 minutes to work through the areas you don’t understand, and take the last 5 to 10 minutes to wrap things up. Doing this in smaller chunks works better compared to cramming it all at once.
Is the Feynman Technique useful in memory-heavy subjects?
Yes. Even with fact-based topics, showing how facts connect helps you remember better. Instead of just memorizing lists, create basic stories or simple cause-and-effect links that tie the facts together. These connections make it easier to recall later.
Is the Feynman Technique like active recall?
They’re similar in some ways. Active recall pushes you to retrieve information, while the Feynman Technique encourages you to explain it. Combining both—explaining while you recall—leads to deeper learning. To get the best results, explain ideas from memory without relying on notes.
How can I avoid oversimplifying and getting things wrong?
Make sure to add a “limitations” note whenever you simplify something. After explaining it, include a quick line like, “This leaves out X, Y, and Z conditions.” This makes the explanation clear but also keeps it honest and practical.